Vote for your Favorite Flower Image
Gary Detonnancourt
Voting ends on Thursday at 5 pm. The new contest will also start at this time and the theme will be "Planes".
Have questions? Use this form to contact us.
We will respond to you as soon as possible.
Thank You,
Gary Detonnancourt
Harrisville, RI 02830
United States
More Than A Snapshot provides online photography education.
This is the blog for More Than A Snapshot's Online Photography Classes. In these blog posts I will give photography tips, tutorials, and show images.
Voting ends on Thursday at 5 pm. The new contest will also start at this time and the theme will be "Planes".
Few users wander into the domain of “blend modes” in Photoshop although it is out there in plain sight. Any time a new layer is added its blend mode can be changed to affect a subtle or drastic change in the way it interacts with the layers below. One of the reasons for users avoiding the blend modes is the terminology associated with the tool. When you click on the blend modes drop-down menu in the layers palette, a whole bunch of options appear with little hint as to what they may do to the image. So, let us start with a general explanation of the blend mode groups and then use a few of them to better understand their uses.
In addition to the always visible “Normal” there are quite a few other blend modes. They are implicitly grouped according to their general effects. I have identified the general function of each group with the added group labels. Although Adobe uses more technical terms for them, this set of group labels is used quite often because they are more descriptive of the blend functions. For instance, the first group will serve to darken the image when possible but never lighten it. Likewise, the second group blend modes will always lighten the image but never darken it. Some blend modes are far more useful in photography and are more frequently used. Although others may have their uses in some instances, many remain on the sidelines for most users. I find the following blend modes quite useful: Multiply, Screen, Overlay, Soft Light, Color, Saturation, Luminosity. In this post, I will share with you some uses of the frequently used blend modes. By the way, in addition to the layer blend modes, Photoshop also offers Brush blend modes, Apply Image, and Calculation blend modes. We will focus only on the layer blend modes this time.
If you read articles, books on blend modes you will come across “Source, Blend, and Result” terms quite often. Each blend mode is a mathematical function that uses the pixel level interaction between the image before a new layer is added and the new layer itself. The layer whose blend mode is under consideration is called the source, the applied blend mode is called the blend, and how the image looks after that is called the result. How the mathematical functions work is not in the scope of this post. If you are interested you can search the Internet to find the mathematical expressions and extensive writing on each function. However, in order to use the blend modes you do not need to know the underlying equation, just what the blend mode does to your image.
You can use the blend modes to quickly fix the exposure and contrast of underexposed, overexposed, and flat images. Here is how to go about it. Keep in mind that the effects of the blend mode adjustments can be localized by using layer masks and their effect can be reduced by lowering the layer opacity.
Fix underexposed image
1. Open the image in Photoshop
2. Create a duplicate layer of the background
3. Change the blend mode of the new layer to “Screen”
4. Adjust layer opacity to reduce the blend mode result if necessary
In essence, you are using the image to repair itself. Depending on the luminance values at each pixel, they will be lightened. This may fix the underexposure problem and the new layer can be duplicated to add more of the same.
1. Open the image in Photoshop
2. Create a duplicate layer of the background
3. Change the blend mode of the new layer to “Multiply”
4. Adjust layer opacity to reduce the blend mode result if necessary
Again, depending on the luminance values at each pixel they will be proportionately darkened and this layer can be duplicated with its blend mode intact to darken the image a little more.
1. Open the image in Photoshop
2. Create a duplicate layer of the background
3. Change the blend mode of the new layer to “Overlay”
4. Adjust layer opacity to reduce the blend mode result if necessary
The overlay blend mode has no impact on middle gray tones; any tonal value lighter than middle gray is proportionately lightened, and any value darker than the mid tone will be proportionately darkened. The result is an image where lights are lighter and darks are darker, in other words, it has more contrast.
When using Unsharp Mask Sharpening, the white halos around the sharpened edges may be hard to control at times. Of course, one can use a layer mask and hide the halos but that will also hide the darkened edges as well. One simple solution is to do the sharpening in two separate layers instead of one. One layer will control the lightened edges and the other, darkened. Here is how we can go about it.
1. Create a merged layer on top of all the layers in the image (Shift-Ctrl-Alt-E), change the name to “Lighten” and change the blend mode to “Lighten” as well
2. Duplicate this layer (Ctrl-J), change the name to “Darken” and change the blend mode to “Darken”
3. Target the “Darken” layer, and apply your unsharp mask. This can be a bit more aggressive than the light edges in the next step since darkened edges do not pop out of the image like the lightened edges in the form of white halos. Consider the output device and apply sharpening while keeping in mind that this is only one-half of the sharpening.
4. Now, target the lighten layer and apply unsharp mask. Here you may consider using a smaller radius, lower amount, and higher threshold but don’t be too shy. While applying this sharpening you will start seeing the full sharpening effect combined with the darkened edges
5. If there are halos that are too visible, add a layer mask and mask the offending halo areas. This will only affect the lightened edges and only the areas you are masking.
There are variants of this method with greater flexibility but for an introductory post on layer blend modes, this should provide a good taste of what this powerful tool can do. We have only scratched the surface of layer blend modes. Keep thinking what else you can do with these tools and don’t forget to experiment, just for the heck of it. You can even change the blend modes of adjustment layers like curves, levels, etc. to control how the adjustment interacts with the layers below. In short, layer blend modes lets you push Photoshop to do the heavy lifting when editing your photographs.
Now, get the blender out!
A. Cemal Ekin, PhD
Kept Light Photography
http://www.keptlight.com
I retired from Providence College in 2012 as Professor Emeritus. Teaching has been a great experience, affected my photography, and how I share what I know with others. That, in turn, has helped me to learn more about photography, my photography, the art of photography.
I am an interested, curious observer, fully self-taught photographer through practice, experimentation, failures, reading and looking at photographs. I write about photography to sharpen my understanding of it. You can see my work, read my articles on a wide range of photography topics, and learn more about my photographic philosophy on my Web site.
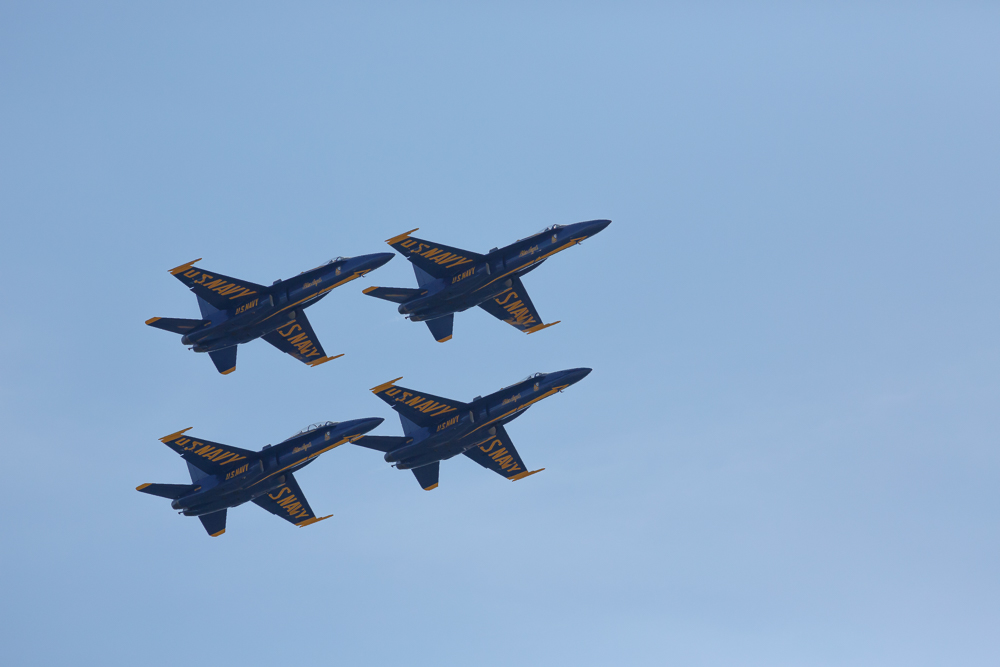
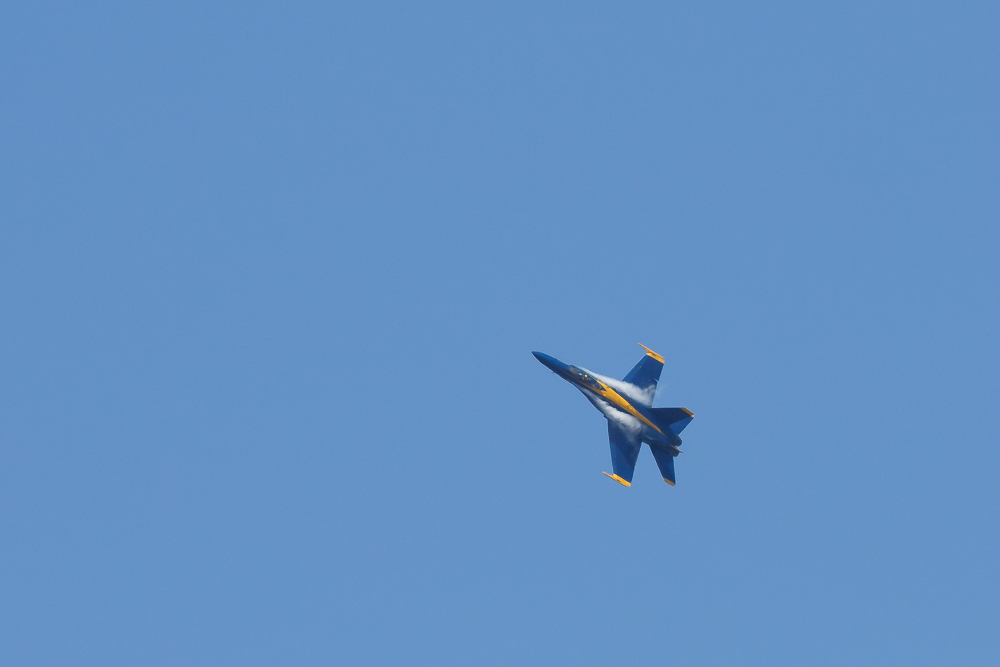
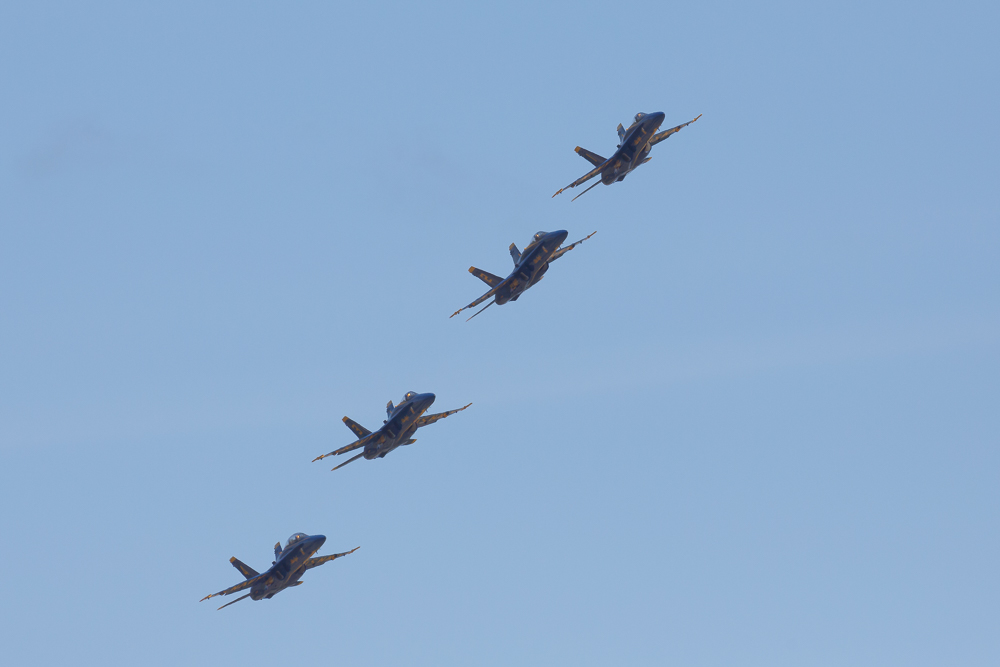
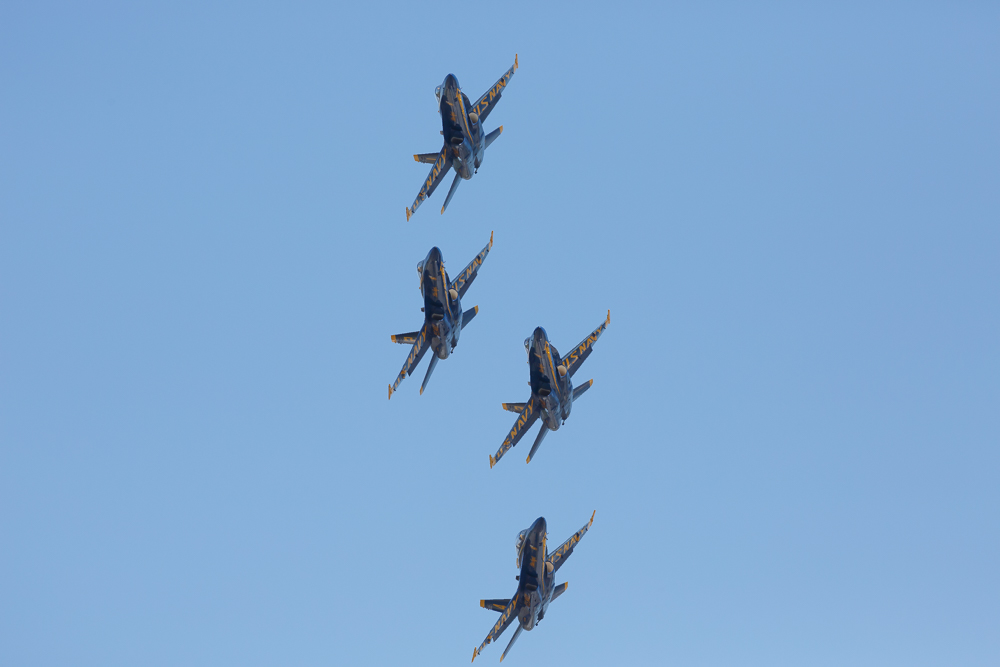
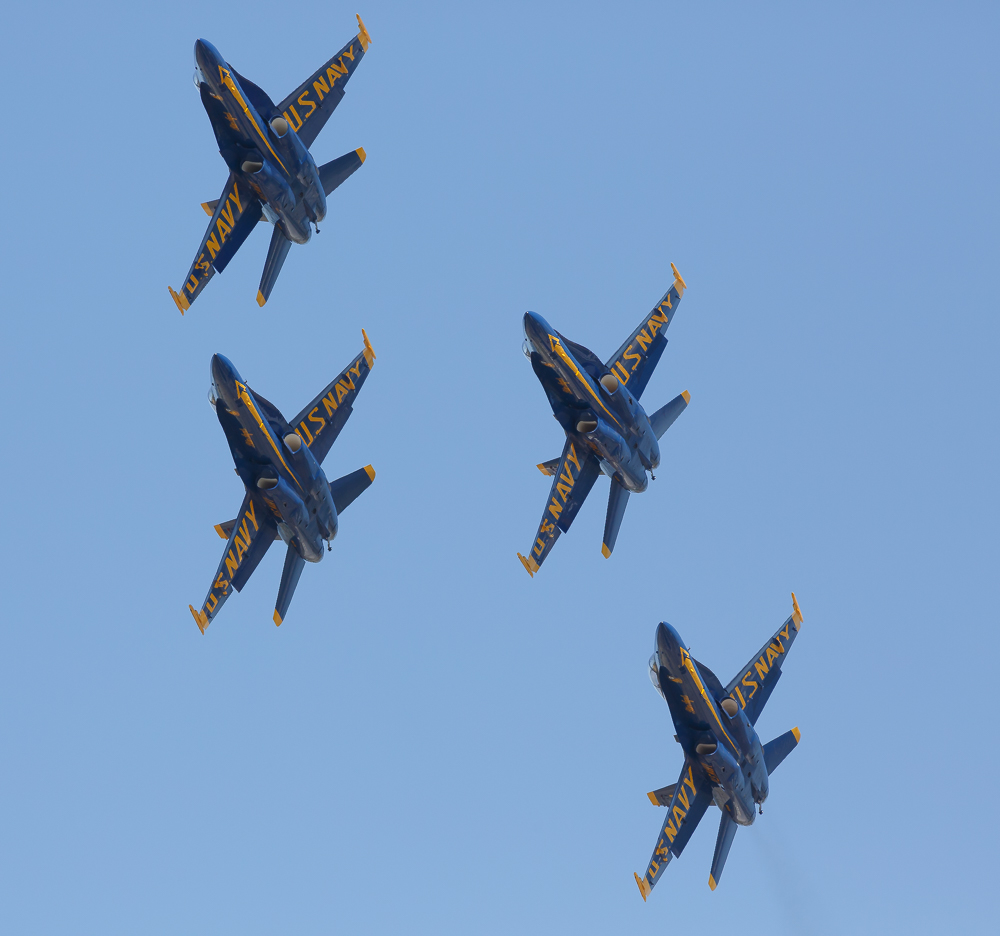
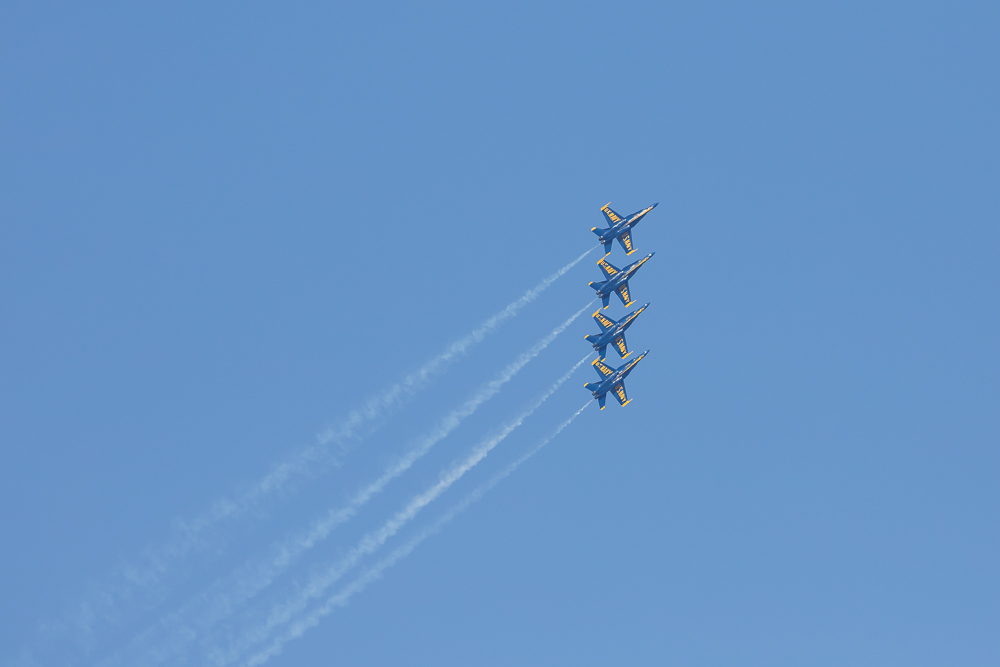
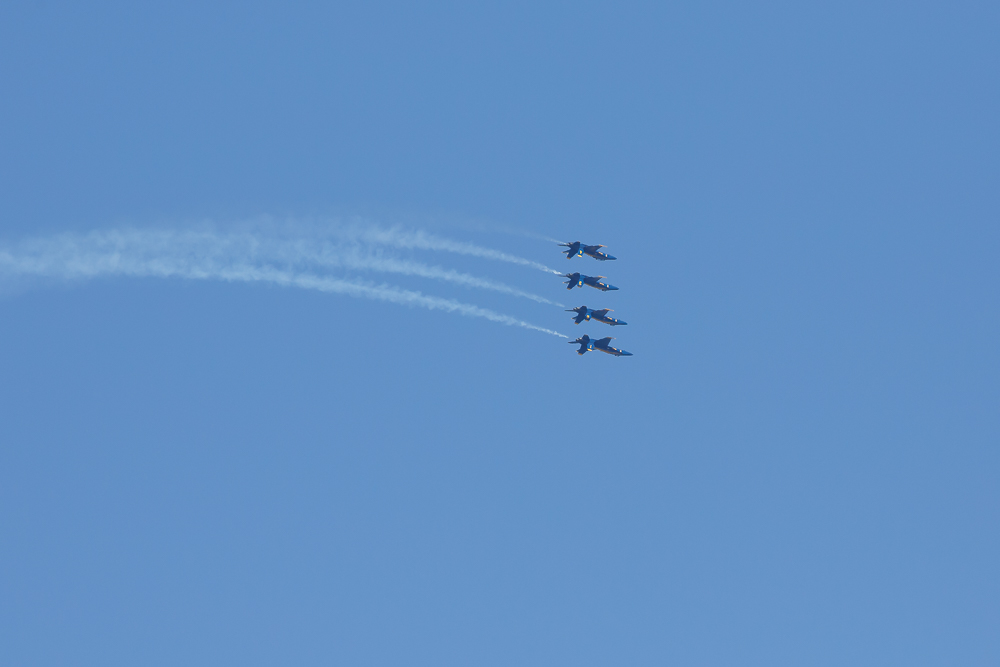
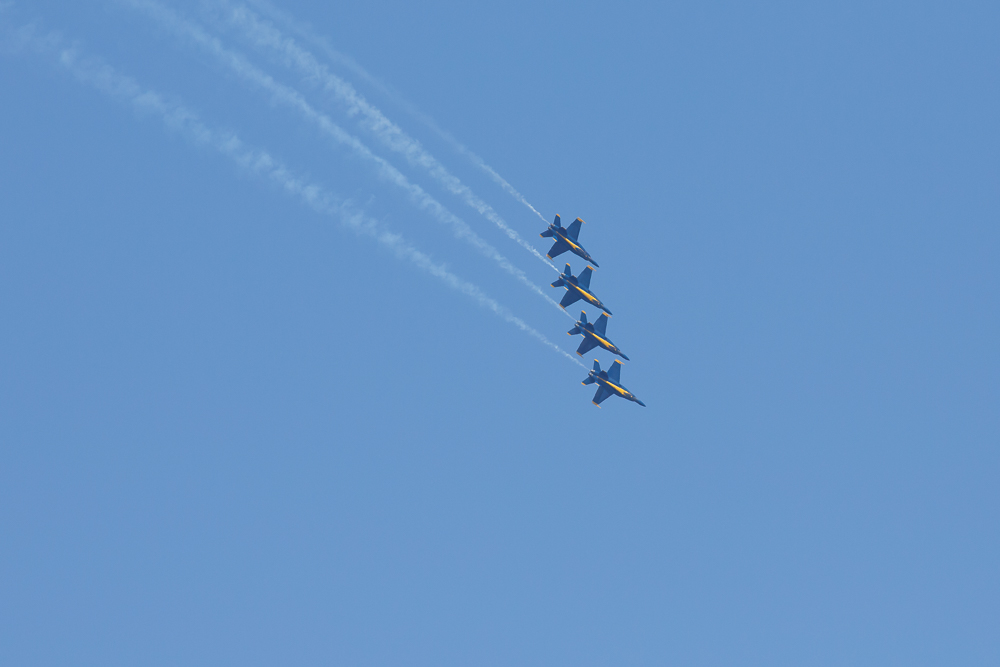
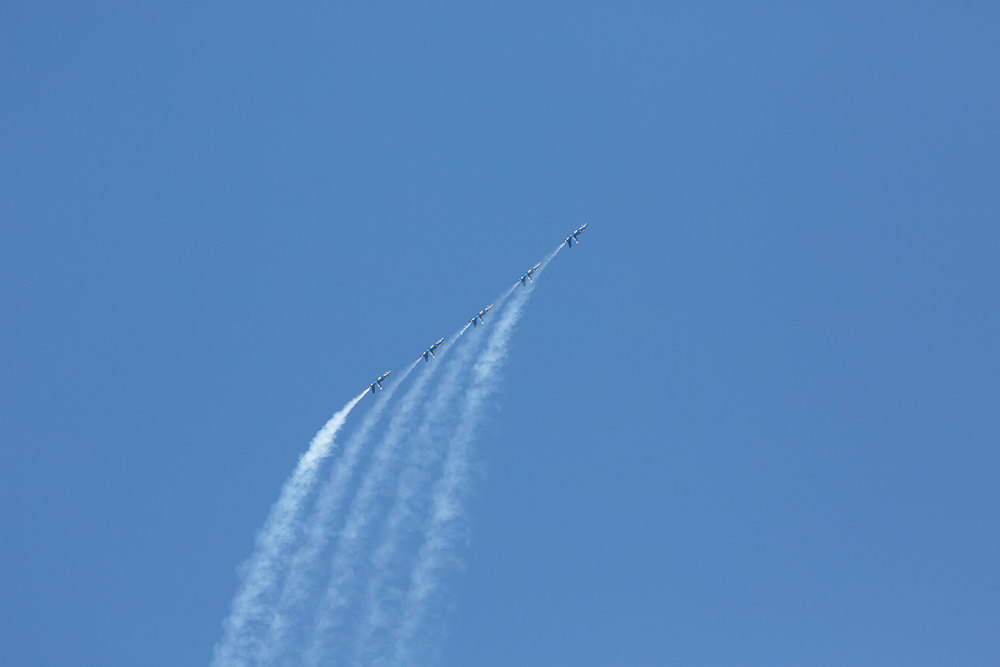
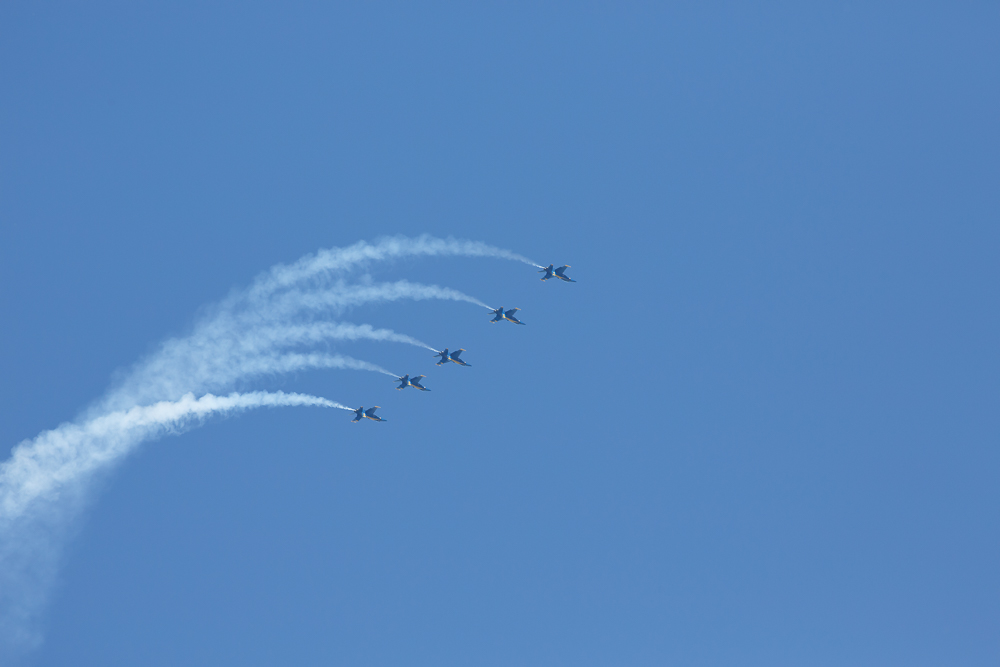
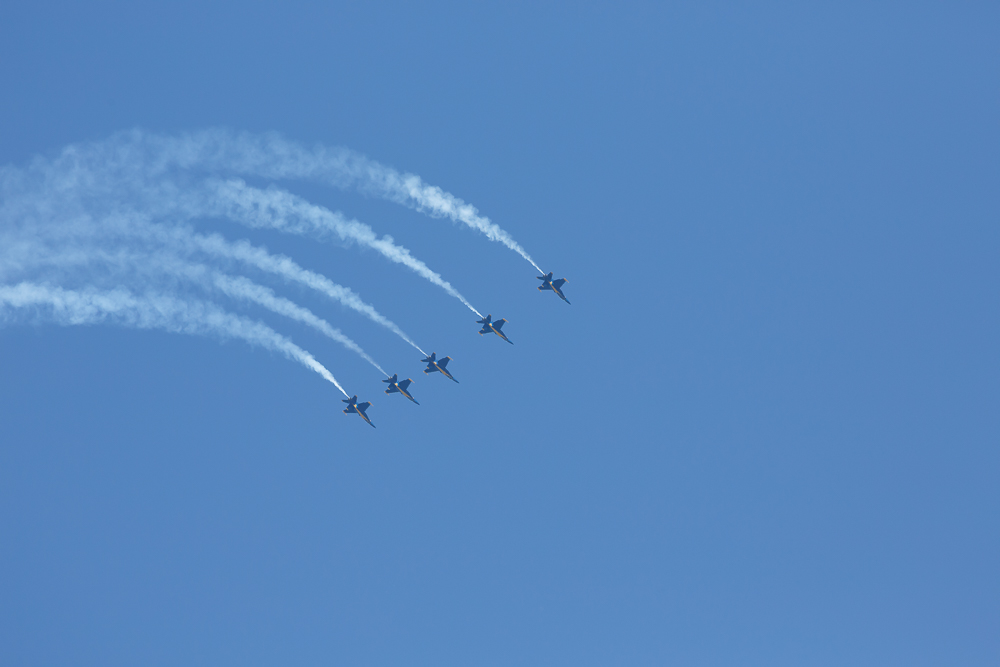
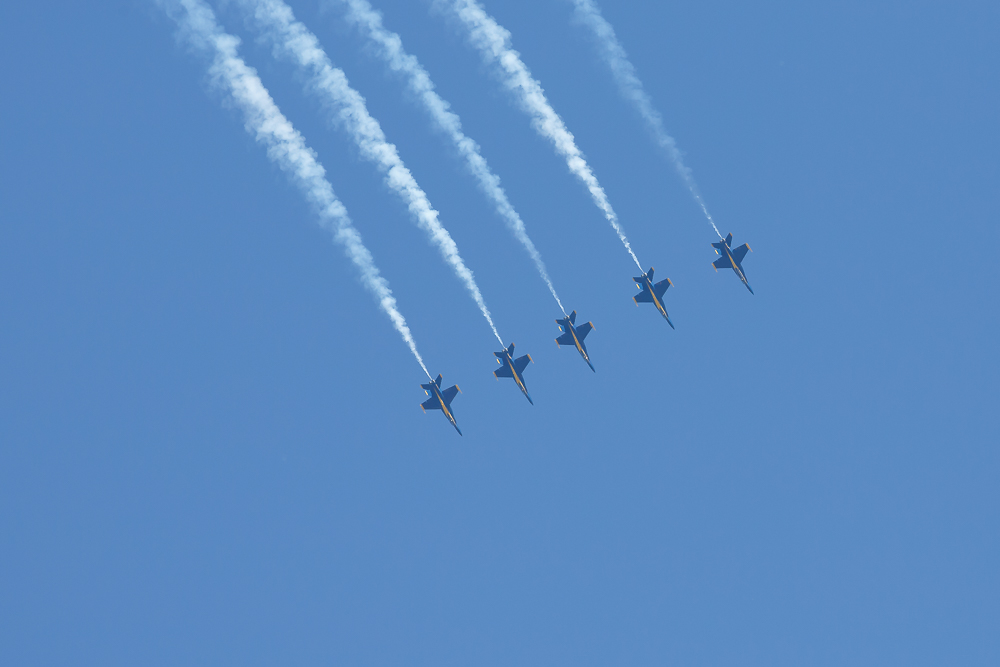
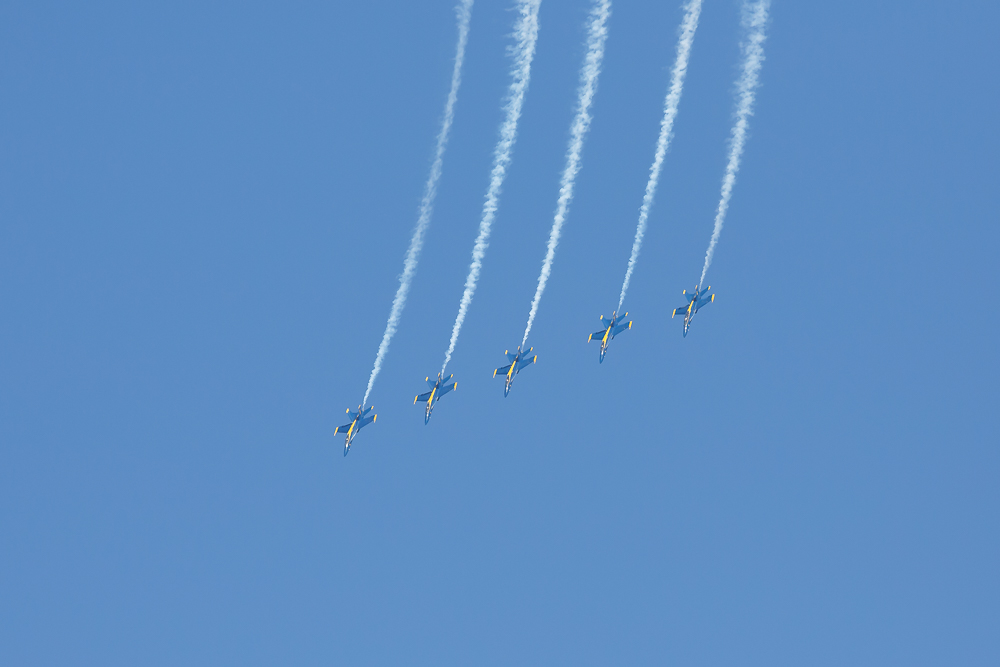
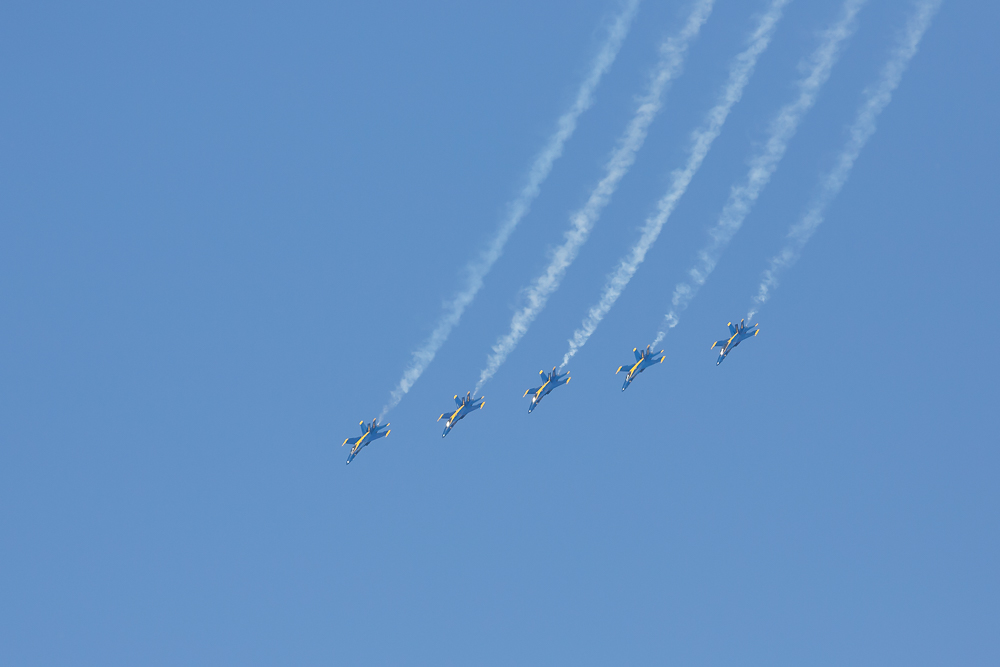
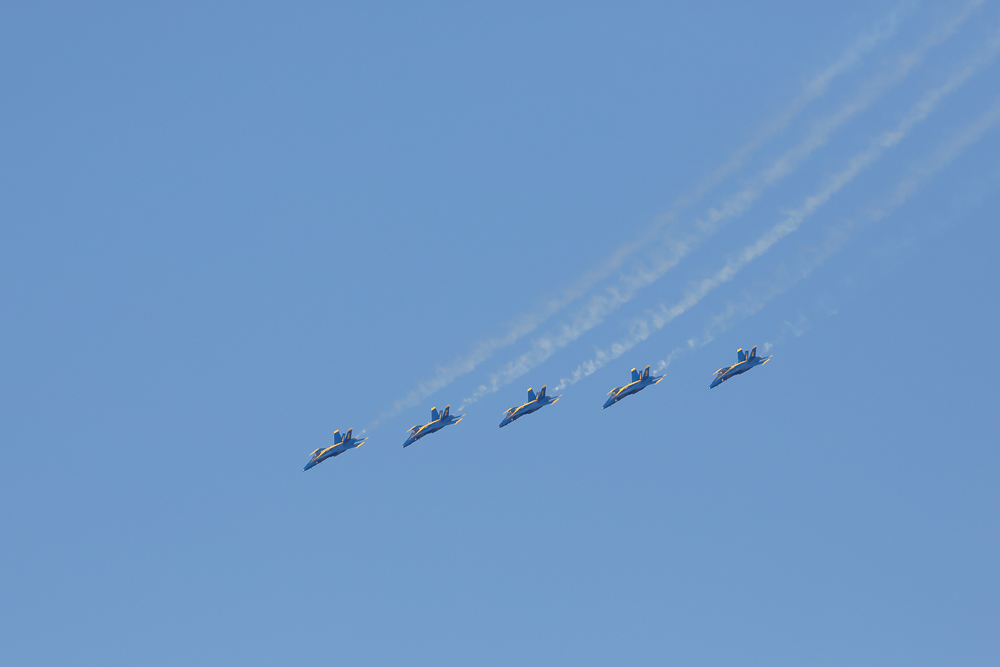
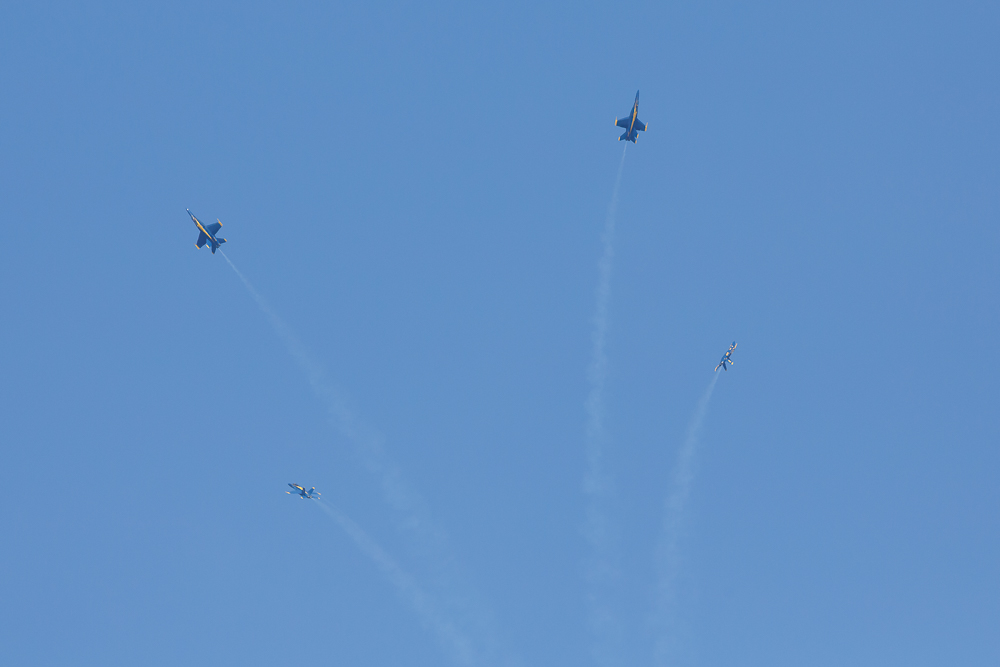
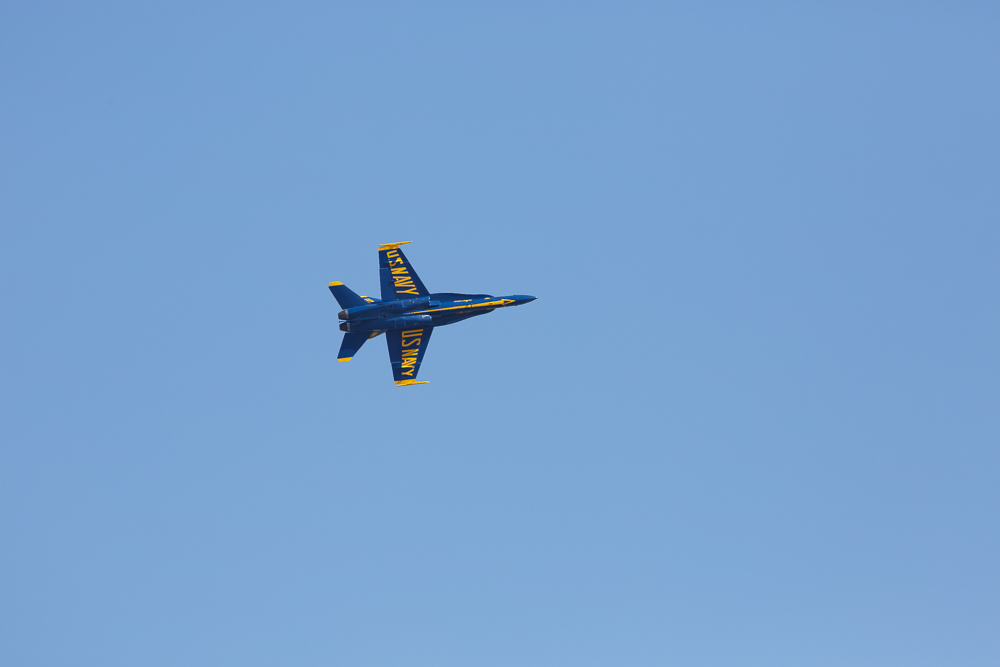
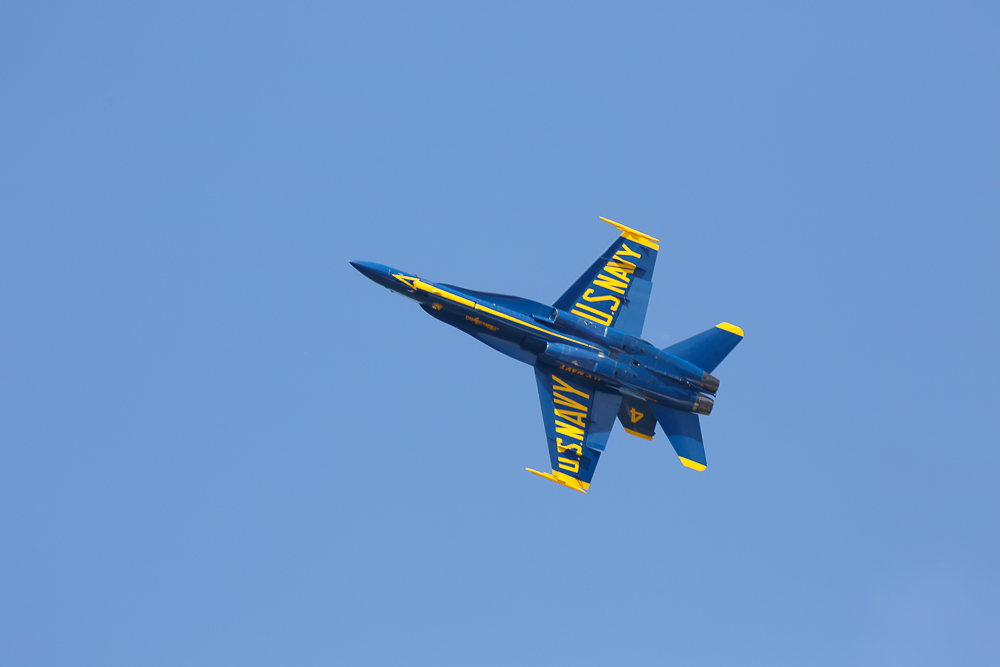
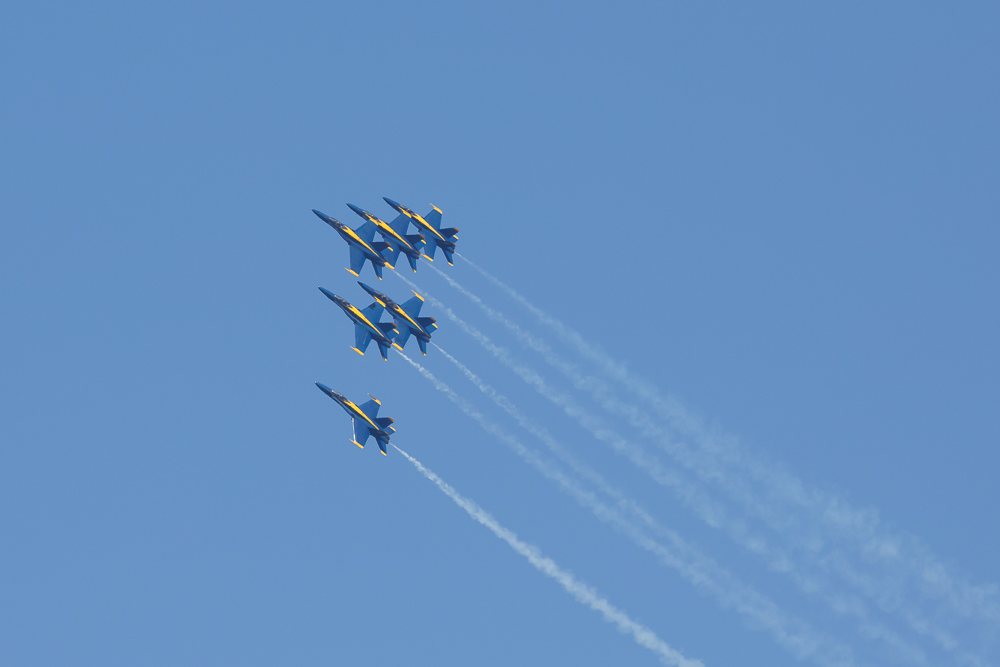
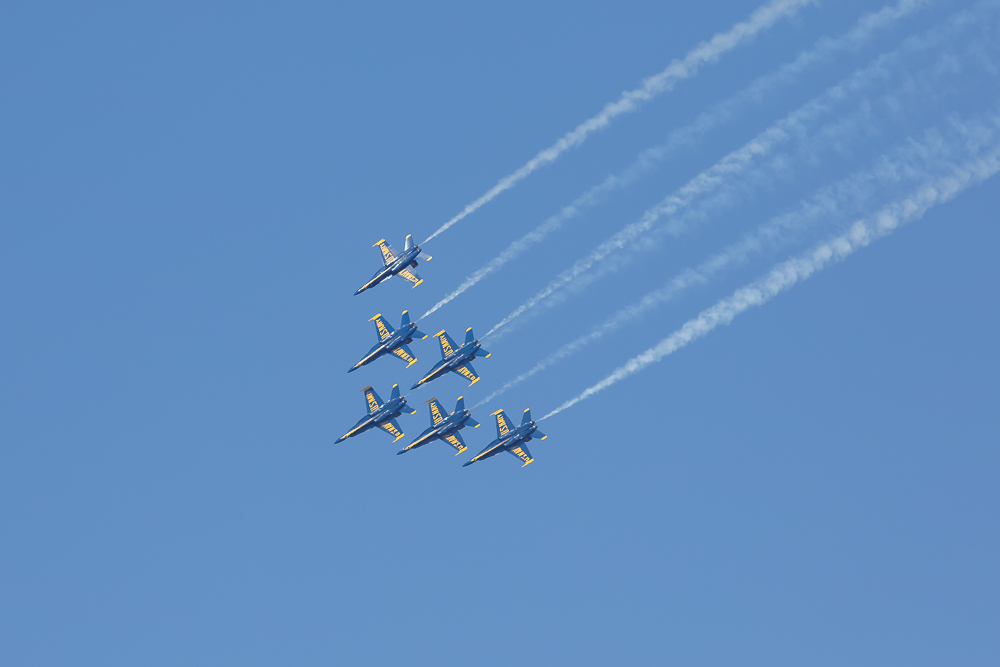
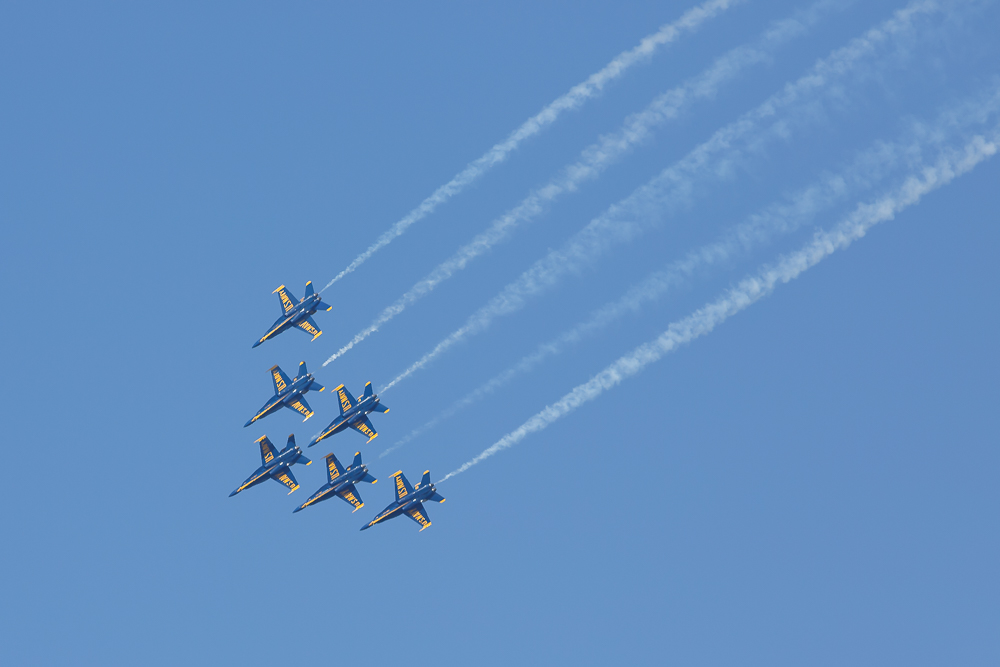
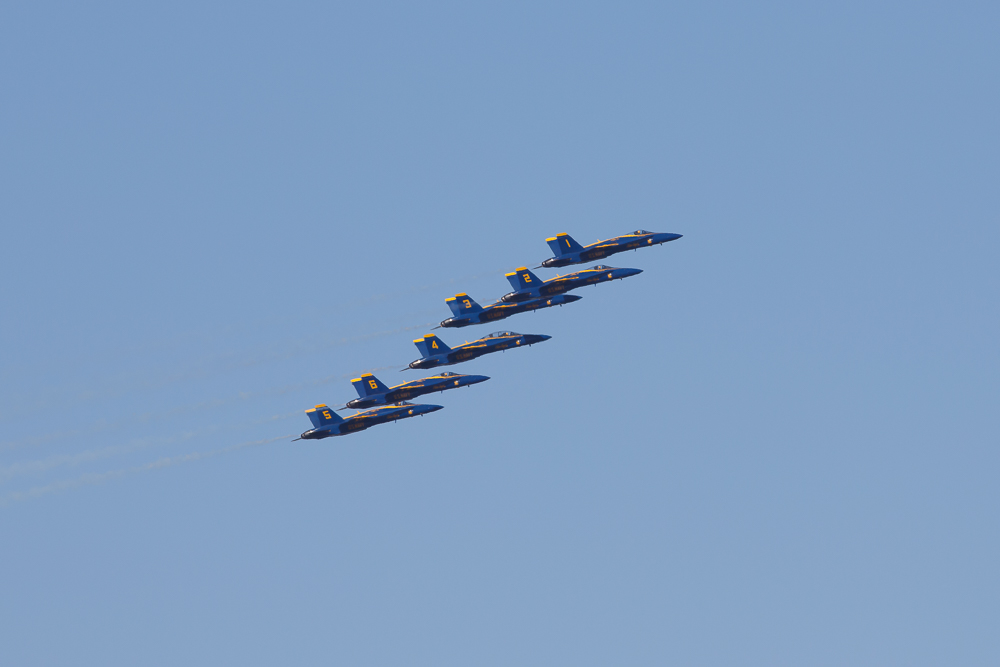
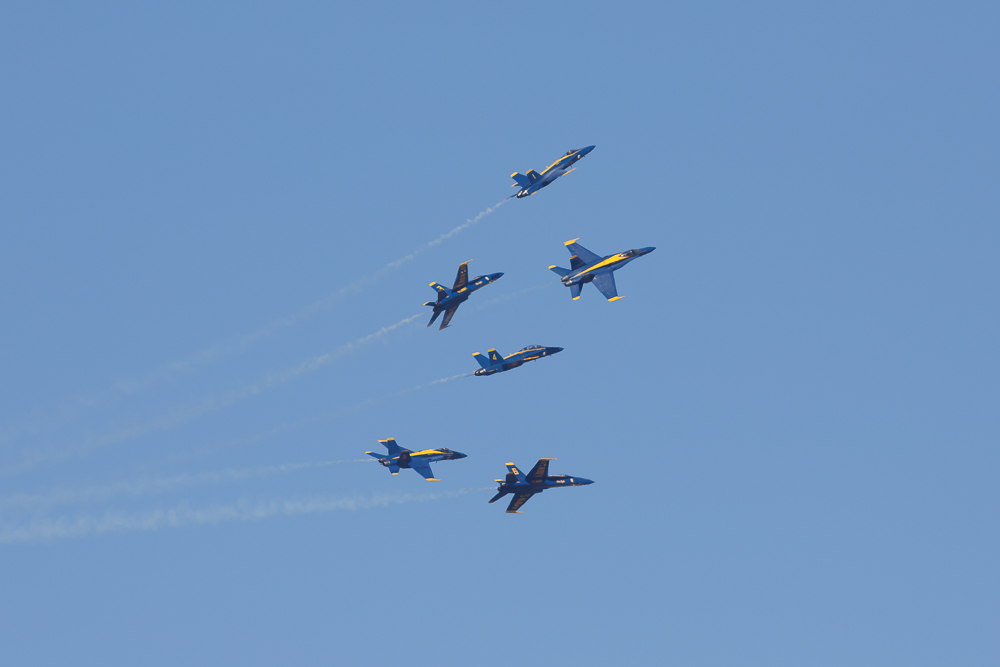
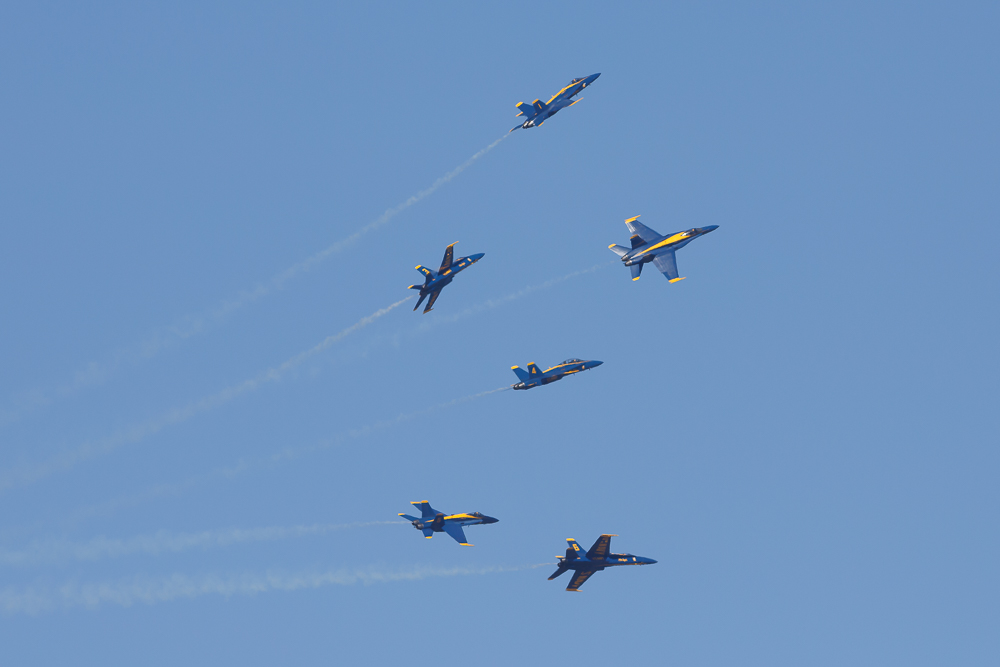
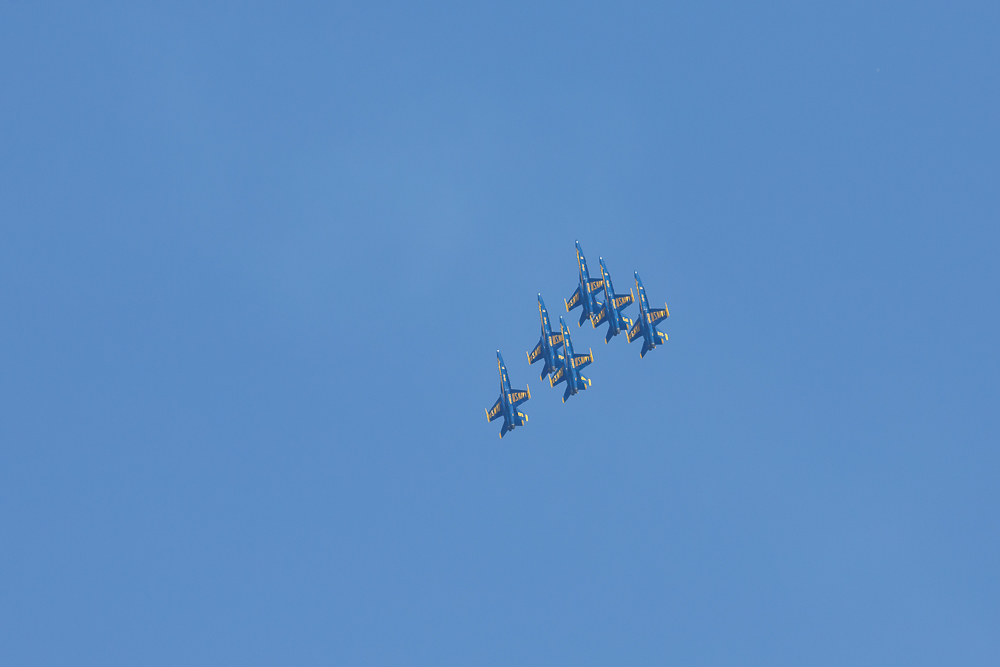
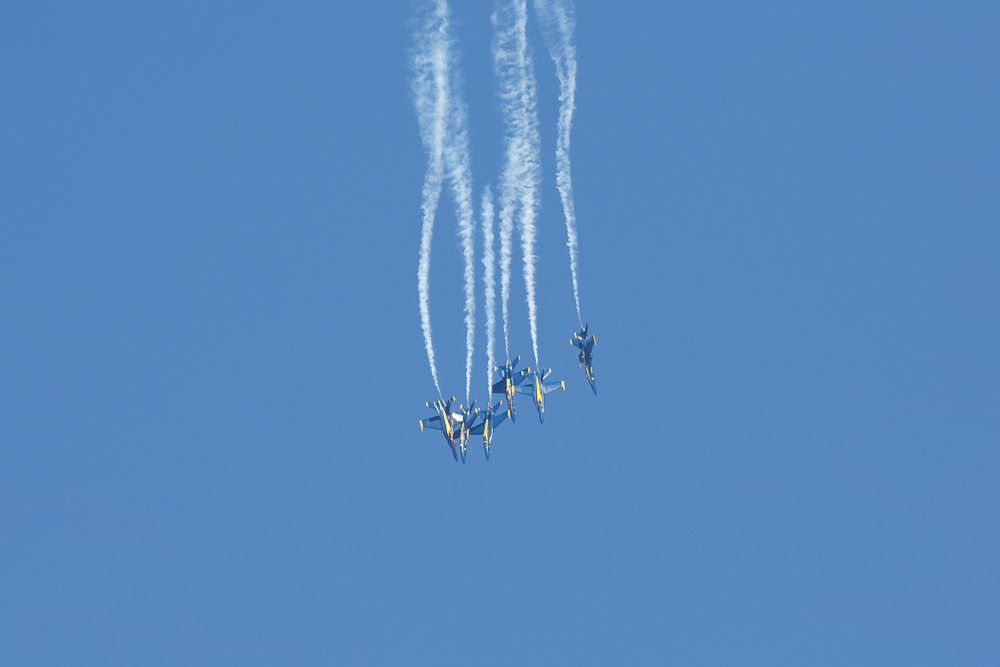
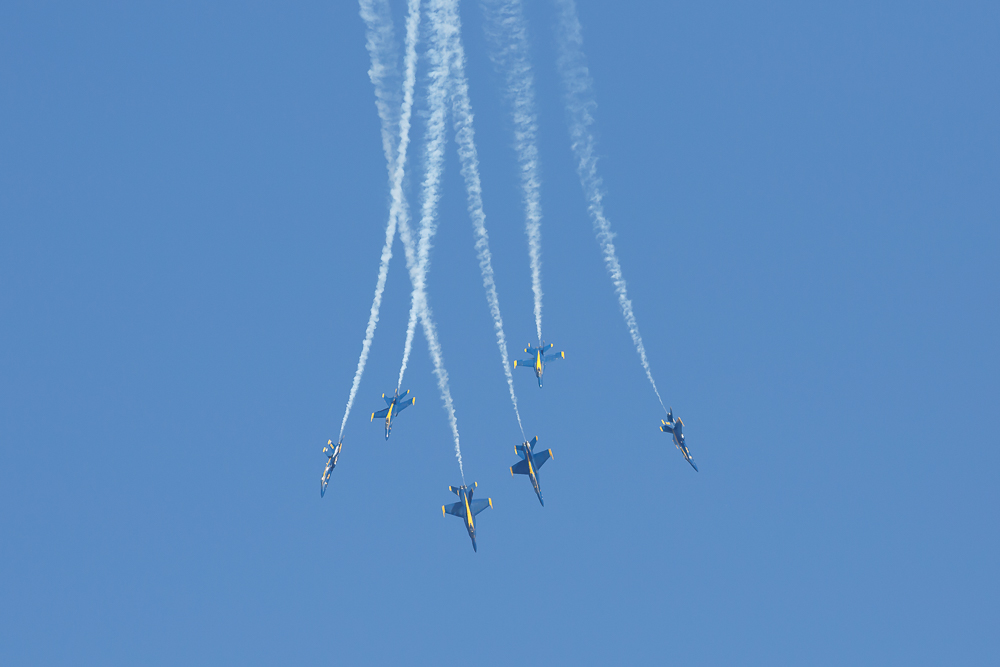
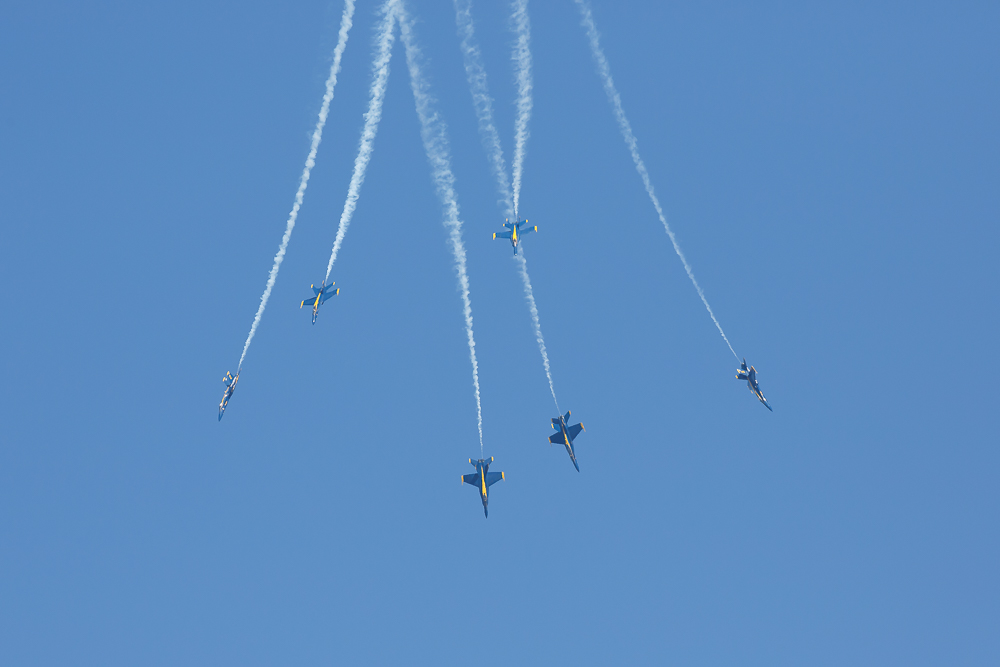
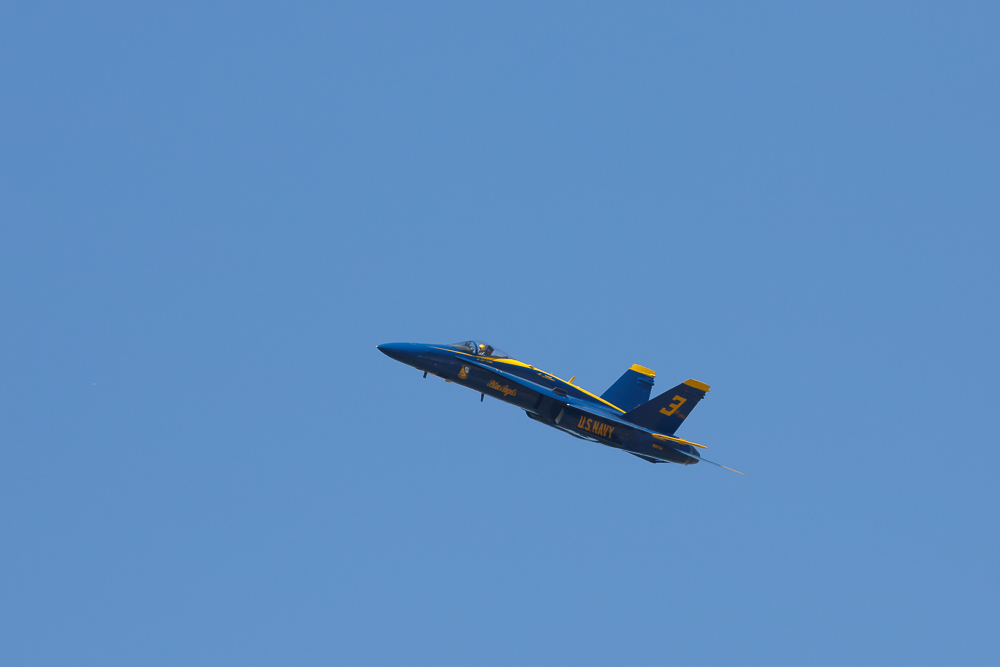
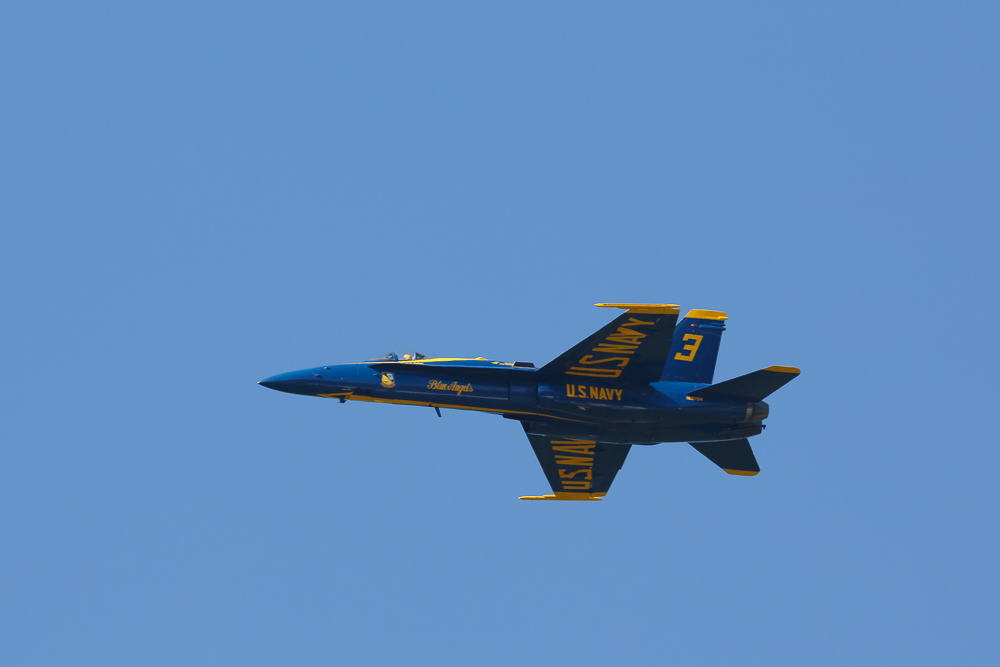
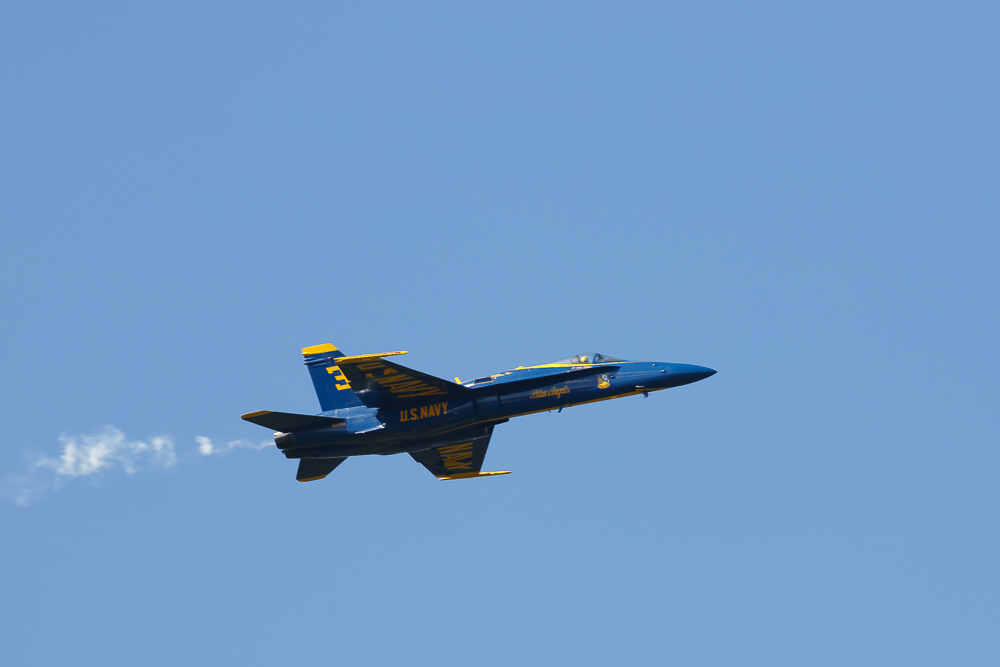
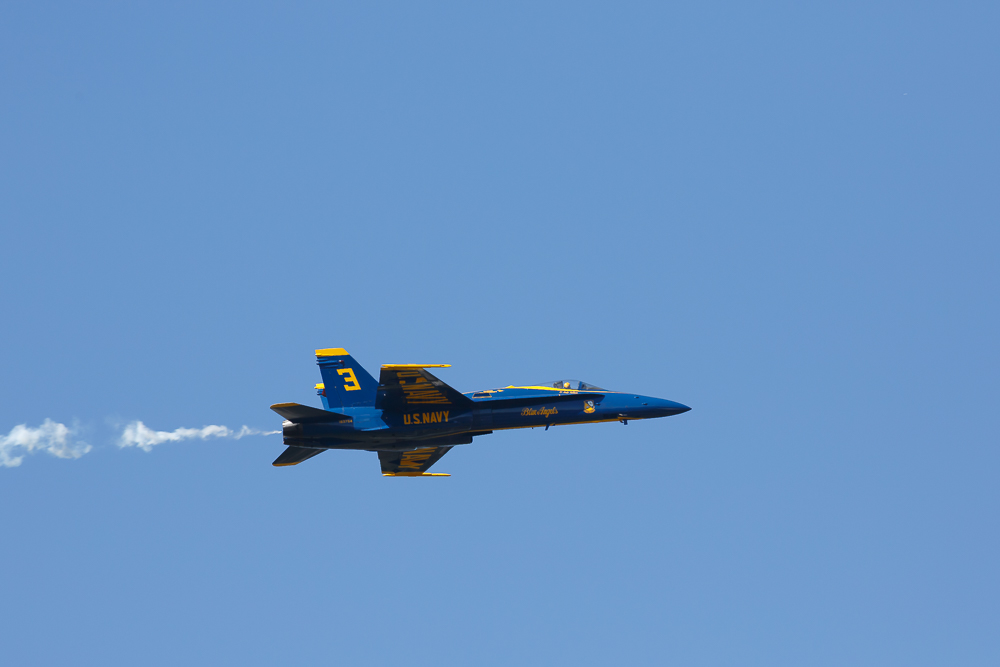
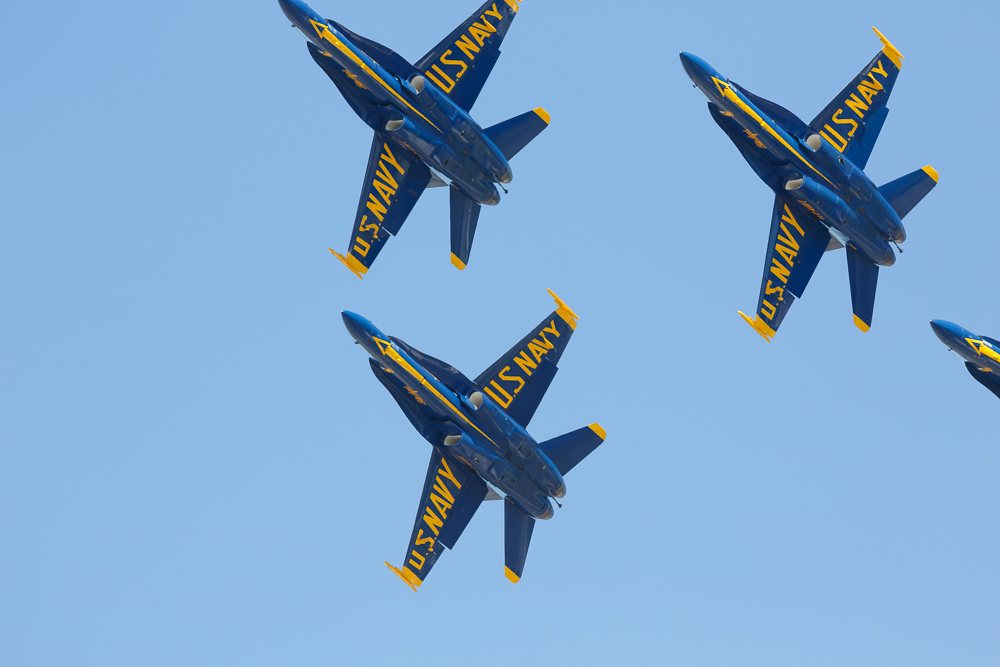
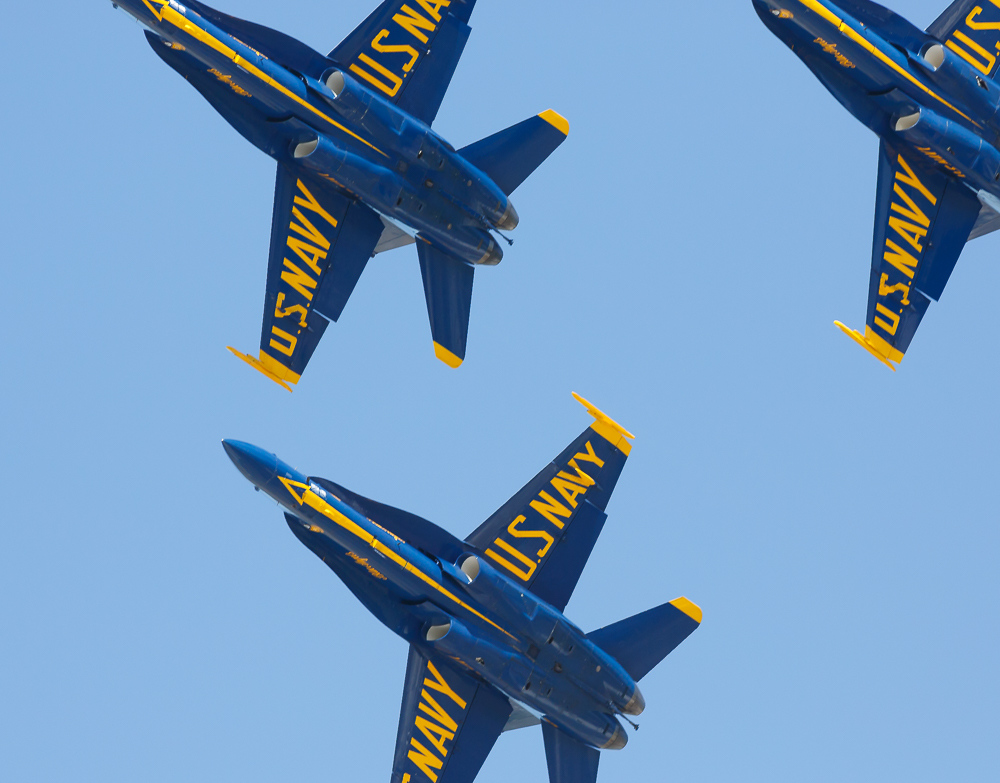
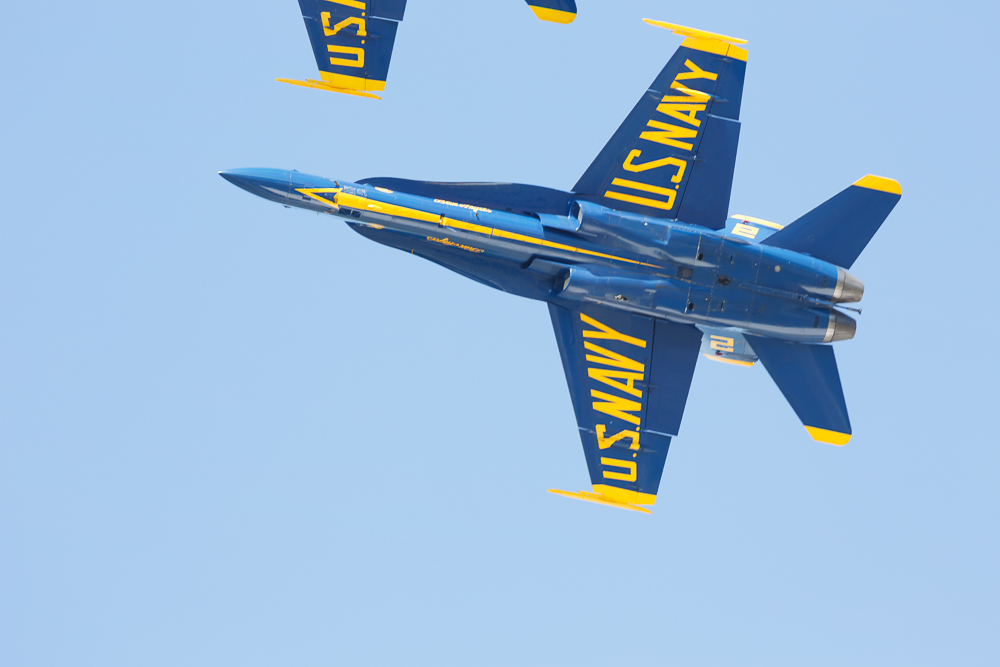
I went to the air show on Saturday afternoon at 2:30 pm when the show ends at about 4 pm. I know this sound kind of stupid and it felt really stupid when I was stuck in the long line of traffic with the other stupid people trying to get there before the show ended. However, I did manage to get to a park that was very close and I got to see and photograph the Blue Angels, which made it all worthwhile.
I use the Canon 5D MIII and the Canon 400 mm F/5.6 for these images. If I had to do it again I would get closer and I would choose the Canon 100-400 mm F/5.6 because when the planes got really close 400 mm was too much zoom and I ended up with a few cut off shots, which you can see below.
Check out our new wildlife photography article featured on more thanasnapshot.com

Guest Blog Post by Nancy Marshall
My interest in photography started in High School with a Nikon FILM camera. Eight years ago I purchased my 1st DSLR, a Nikon D70s and now shoot with the Nikon D810. I have explored all avenues of photography including portraits, macro, landscape, etc. but it is with Nature and Wildlife that I have found my passion.
Red Fox Mother
Recently I was blessed and privileged to spend time with a Red Fox family. For 3 days I watched, photographed, and just enjoyed being in the presence of these amazing creatures. The kits would run, play, sleep, and explore while waiting for Mama to return from hunting. When she did return, it was a mad dash to get to her for nourishment since they were all nursing. To witness such an event was beyond exciting and memorable.
When photographing wildlife one must remember, IT IS WILDLIFE! Keep your distance and give them their space. So often, I have seen people approaching wild animals and infringing on their territory. This could prove dangerous for both you and them! This holds especially true if there are youngsters involved. Getting too close puts undo stress on the youngsters as well as the parents.
Nursing Kits.
As you can see from the above photos Mom and kits are quite comfortable going about their activities. All of these images were taken from a comfortable distance with a telephoto lens and cropped! I personally would never compromise the welfare of an animal for the sake of an image.
This image was taken at 600mm with an ISO of 500, Aperture 6.3 with a shutter speed of 1/3200 freezing the action, catching the kits running and playing.
When photographing wildlife I usually shoot in aperture priority maintaining an F/stop around 7.1/ 8. I have found that is a “sweet” spot with my lens. ISO depending on how bright the day is will be 400-500. The key is to stop action so it is important for the shutter speed to be fast.
Photographing wildlife takes patience and perseverance. Sometimes it really is a waiting game but the rewards can be immeasurable. Sit, watch, listen, and learn their movements and habits! Once you observe your subject for some time you will be able to anticipate their actions therefore giving you a much better chance at capturing a memorable image. And sometimes those memories are not meant to be captured digitally but meant solely for your memory.
Get out there, it is a wonderful world we live in and I can guarantee once you “tune in” you will SLOW DOWN, become more and more aware of your surroundings and all the beauty it has to offer.
Portrait of Mama, ISO 500, f/7.1, 1/3200 at 600 mm and cropped.
Every week you may post 2 of your best images for our photo challenge. To Enter please upload the images in the comment section below by clicking on the Landscape icon or if you use an image host like Flickr by pasting the embed link in the comment bar. Please post each image in a separate comment for voting purposes. You may earn bragging rights and maybe even some cool prizes.
I will post a new subject on Thursday of each week. The previous week's contest will end Thursday at 5 pm EST. The winner will be selected from the number of likes an image has acquired over the week and ties will be settled by the number of comments or by me.
Voting: Please remember to visit often and to like (click the up arrow) then comment on your favorite image (with "My Vote"). Please vote before 5 pm on Thursday and only one time. Good Luck! Click here to see last week's winner.
Here are this week's image critiques for the students of morethanasnapshot.com's online photography class. If you would like to have your images critiqued on a regular basis please join my class. I have chosen the image above as the image of the week, congratulations to Jermane Stephinger.
Vote for your favorite bird image by writing "my vote" as a comment under the image you like.
Killdeer lay their eggs along roadsides. Which is why these were photographed on a gravel road.