Contact Us

Have questions?  Use this form to contact us.

We will respond to you as soon as possible.

Thank You,

Gary Detonnancourt


Harrisville, RI 02830
United States

More Than A Snapshot provides online photography education.

Booth Bay Harbor 2013-5410-color enhanced.jpg

Blog

This is the blog for More Than A Snapshot's Online Photography Classes.  In these blog posts I will give photography tips, tutorials, and show images.

Mastering the Art of Street Photography: Essential Tips and Techniques

Gary Detonnancourt


by

GARY DETONNANCOURT

Photography Educator.


People interested in street photography will have the chance to capture the beauty of everyday life and genuine moments. This type of photography is distinct because it necessitates technical abilities as well as a talent for creating engaging compositions. If you're new to the field or an experienced photographer, the following tips will help you produce stunning and authentic street photography.

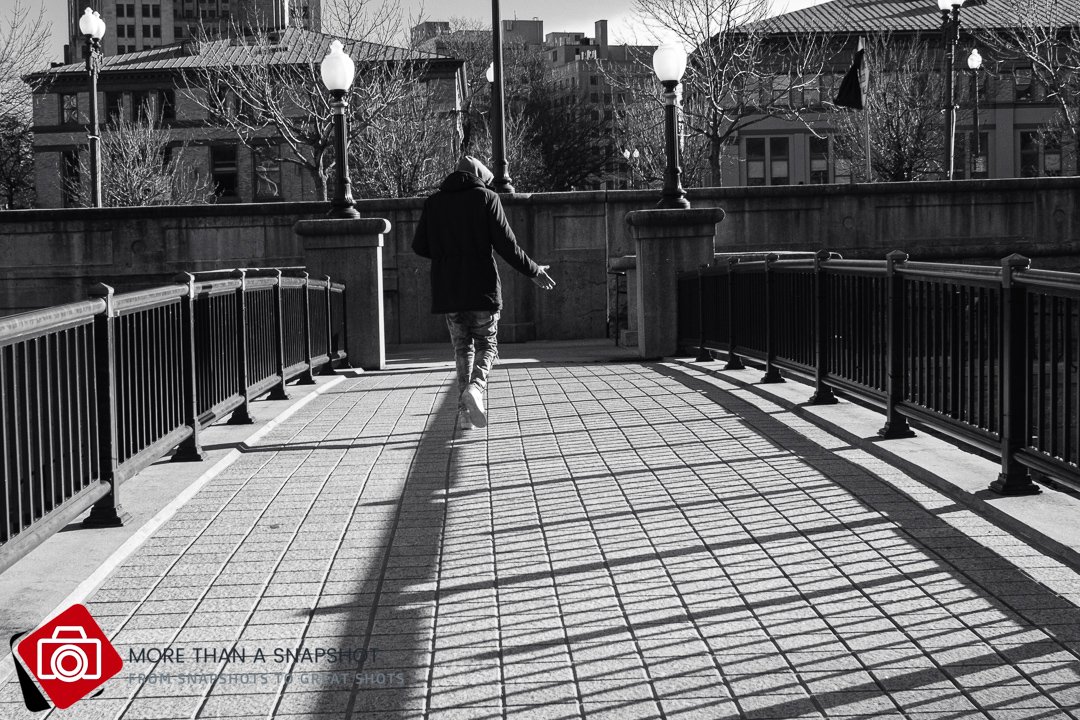
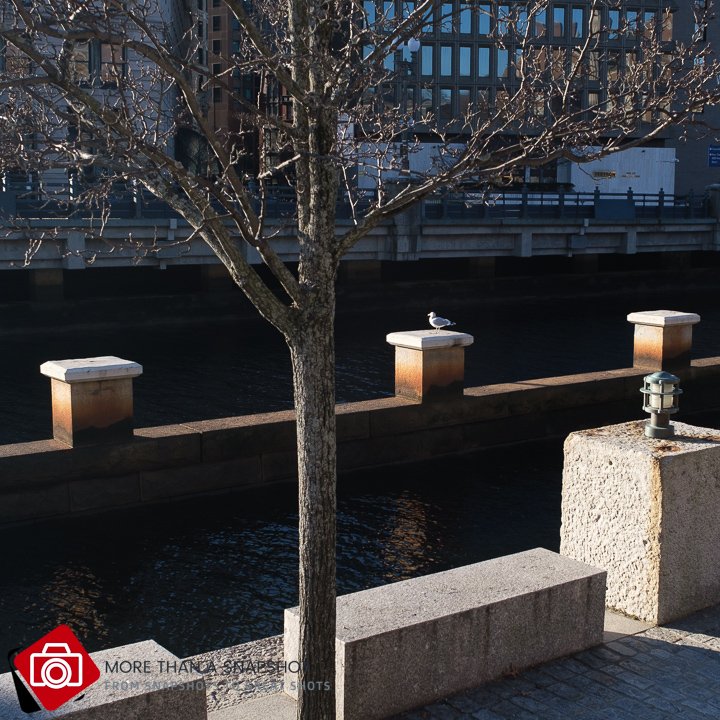
Providence, RI. by Gary Detonnancourt

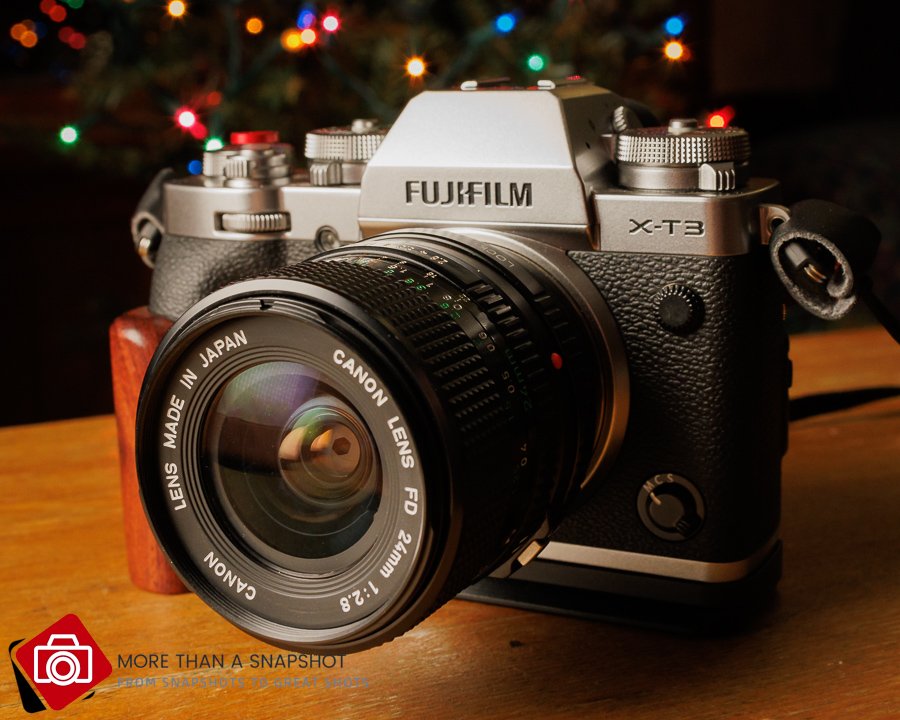
  1. Choose the Right Gear:

Street photography is great because you don't need costly equipment to take amazing photos. Even a smartphone, mirrorless camera, or compact camera can work for capturing candid shots. Choose gear that is lightweight, so you can move freely without drawing attention.

  • Observe and Blend In:

Being inconspicuous is key to capturing authentic moments on the streets. Observe your surroundings, anticipate interesting scenes, and blend into the environment. Avoid drawing unnecessary attention by dressing casually and using quiet camera settings to avoid distracting shutter sounds.

  • Composition is Key:

To take great street photos, it's important to have good composition skills. This means paying attention to details like leading lines, symmetry, patterns, and framing. Also, try to find interesting backgrounds and unique perspectives that will make your photos more visually interesting. Experiment with different angles to add more depth and make your shots more captivating.

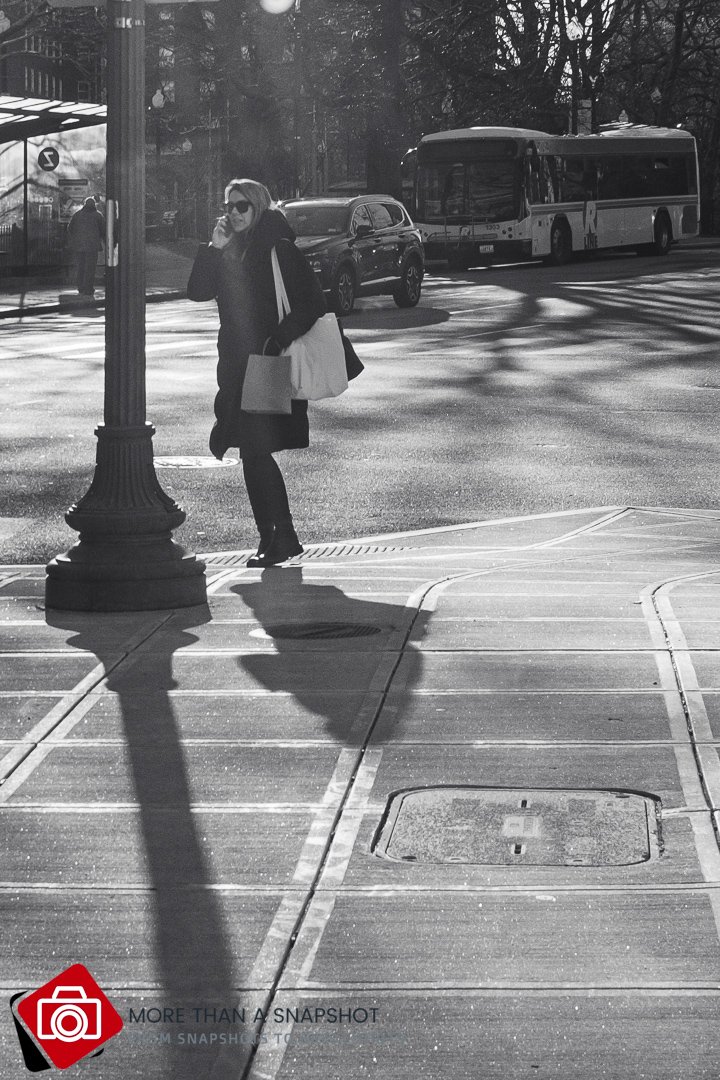
  • Play with Light and Shadows:

To improve the mood and impact of your street photographs, pay attention to the lighting. Try different lighting conditions, like the harsh midday sun, soft morning or evening light, or the dramatic shadows of urban architecture. Observe how the light interacts with the environment and subjects, and use the interplay between light and shadows to create captivating compositions.

  • Focus on Emotions and Stories:

When you do street photography, your aim is to tell stories and capture human emotions through images. To achieve this, search for candid moments that express various emotions like joy, solitude, and surprise, among others. It's important to connect with people to capture genuine expressions that convey the emotions you're after.

  • Shoot in Burst Mode:

Capturing the perfect shot on the bustling streets can be challenging. One helpful tip is to use burst mode, which allows you to take a series of quick shots in quick succession. By doing so, you will increase your chances of getting that decisive moment you are aiming for. Moreover, it also provides you with more options during the editing process.

  • Experiment with Different Styles:

You can apply different styles and techniques to street photography, including high-contrast black and white, vibrant colors, and minimalistic compositions. Try experimenting with long exposures, panning, or using reflections to create unique images. Continuously push your limits to develop your own signature style.

  • Respect Privacy and Ethics:

When taking street photos, it's important to show respect for people's privacy and dignity. You should also be aware of cultural sensitivities and ask permission when needed. Finding a balance between creating interesting photos and being respectful of your subjects is crucial.

  • Practice and Patience:

Developing the skill of street photography takes time and practice. The more you engage with the craft, the more adept you become at identifying distinctive moments and refining your technical prowess. It's important to maintain patience, as some days may be more productive than others. Broadening your portfolio and obtaining novel outlooks can be accomplished by exploring various neighborhoods, cities, and cultures.

  • Learn from the Masters:

To gain inspiration and improve your skills in street photography, analyze the techniques used by famous street photographers. Focus on their composition, storytelling, and interaction with their subjects to broaden your creativity and develop a critical eye.

Conclusion:

If you want to take your street photography to the next level, these essential tips and techniques can help you improve your skills and creativity. Always keep in mind that the streets provide a limitless opportunity for artistic expression.

Photo Book Friday 02: Night on Earth by Art Wolfe

Gary Detonnancourt

Review of the book “Night on Earth” by Art Wolfe

Review by Gary Detonnancourt

Where to purchase:

In this video, we will be uncovering the stunning visuals of Art Wolfe's "Night on Earth". This photo book is a beautiful tribute to the natural beauty of the night sky and will leave you marveling at the stars every time you look at it. Book Link: https://amzn.to/3FEo3zn

Photo Book Friday 01: The Photo Ark by Joel Sartore

Gary Detonnancourt

Photobook Friday Episode 1

In this video, I'm sharing my review of Joel Sartore's The Photo Ark. I highly recommend this book if you're interested in photography or natural history. Joel Sartore's The Photo Ark is a must-read for anyone interested in photography or natural history. This book is packed full of amazing photography and interesting anecdotes. If you're a fan of wildlife, then you need to add this book to your collection!

Book Link: https://amzn.to/41HCWu2

Discover the INSIDER Secrets for Setting up the Canon R50 Menu Settings

Gary Detonnancourt

Introduction

The Canon EOS R50 is a powerful camera with many features and settings that can be adjusted to get the best out of your shots. To make the most of this device, it’s important to understand how to configure and set up its menu settings. This tutorial will guide you through the basics of the Canon R50’s menu layout, UI, navigation, and essential functions such as focus modes, exposure, ISO, white balance, etc.


Understanding the Layout and Navigation

The first step in setting up your Canon EOS R50 is understanding its menu layout and navigation. The main menu consists of several tabs that are organized into categories such as Shooting Menu 1-6, Playback Menu 1-2, Setup Menu 1-4, Custom Functions Menu 1-3, My Menu*, and Wi-Fi/NFC*. Each tab contains a list of options that can be adjusted according to your needs. To access these options, simply press the “Menu” button on the back of your camera. You can then use the multi-controller or touch screen to select an option from each tab.


Focus Modes

The focus mode setting allows you to choose how your camera will focus on a subject when taking a photo or video. The available focus modes include One-Shot AF (for still subjects), AI Servo AF (for moving subjects), Manual Focus (for precise focusing), and more. To adjust this setting, go to Shooting Menu 2 > AF Mode > select one of the available options.


Exposure

Exposure determines how bright or dark an image appears by adjusting shutter speed and aperture size. To adjust this setting, go to Shooting Menu 3 > Exposure > Select one of the available options, such as Program AE (P), Shutter Priority AE (Tv), Aperture Priority AE (Av), or Manual Exposure (M).


ISO Sensitivity

ISO sensitivity determines how sensitive your camera is to light when taking photos or videos in different lighting conditions. To adjust this setting go to Shooting Menu 3 > ISO Speed Settings > Select one of the available options, such as Auto ISO or Manual ISO settings ranging from 100 - 51000, depending on what type of shot you are trying to take.


White Balance

White balance adjusts colors in an image so they appear natural under different types of lighting conditions, such as sunlight or artificial light sources like fluorescent bulbs. To adjust this setting go to Shooting Menu 4 > White Balance > Select one of the available options, such as auto WB or manual WB settings, for specific types of lighting conditions like Daylight/Sunny/Cloudy/Tungsten/Fluorescent etc..


Tips & Tricks

Here are some tips & tricks for getting better results when using your Canon EOS R50:


  • Use RAW format for maximum image quality; it provides more flexibility when editing photos later on compared to JPEG format which compresses images significantly reducing their quality over time.


  • Make sure you have enough storage space on your memory card before shooting; if you run out while recording video it may cause problems with playback later on due to corrupted files being saved onto it instead of complete ones.


  • Use manual focus mode for precise focusing; it gives you more control over where exactly your lens focuses instead of relying solely on autofocus which may not always be accurate depending on what type of shot you are trying to take (e.g., macro photography).


  • Adjust white balance manually if needed; auto white balance may not always produce accurate results depending on what type of lighting conditions you are shooting in so it's best practice to double-check by adjusting this setting manually if necessary before taking any photos or videos with your Canon EOS R50 camera!


Conclusion

By following these steps and understanding all relevant menu settings for configuring and setting up your Canon EOS R50 camera correctly, you should be able to get great results every time! Don't forget about some useful tips & tricks mentioned above too – they'll help ensure that all shots taken with this device look their best!


Sources:

 
26 Black & White Lightroom Presets
$19.99

This digital download includes a zip file with 26 Black & White Lightroom Presets that can be used in the Develop Module of Lightroom Classic or Lightroom CC.

Add To Cart

Introducing the New Canon R50

Gary Detonnancourt

The Canon EOS R50 is a compact and lightweight mirrorless camera that offers impressive features for both photo and video content creators. With a versatile set of tools and upgrades from its predecessor, the EOS M50 Mark II, the R50 is designed to cater to the needs of vloggers and creative enthusiasts alike.

One of the most notable upgrades is the R50’s 24.2MP APS-C CMOS sensor and DIGIC X image processor, which delivers high-resolution imagery with striking and accurate colors. The camera offers a flexible ISO 100-32000 range that is expandable to ISO 51200 for working in difficult lighting conditions. Additionally, 6K oversampled UHD 4K 30p video recording is supported, as well as Full HD 1080 120p for slow-motion playback. With the DIGIC X image processor, the R50 is capable of processing high-speed bursts and high-resolution 4K video, supporting up to 15 fps continuous shooting via its silent electronic shutter.

The R50 also features an advanced Dual Pixel CMOS AF II system, with 651 high precision autofocus zones, providing fast and accurate focusing performance. This phase-detection focusing system offers enhanced subject detection and tracking, with the ability to intelligently recognize people, animals, and vehicles while automatically locking onto these subjects and maintaining sharp focus throughout bursts and video captures. This system is particularly useful for vloggers and content creators who require smooth and consistent autofocus tracking.

The R50 also offers a bright and clear 2.36m-dot OLED EVF for a pleasing electronic viewfinder experience, as well as a large 3.0" 1.62m-dot vari-angle touchscreen that provides an intuitive interface for controlling focusing points, navigating menus, and reviewing imagery. This screen also features a vari-angle design for ease of use when working from high and low angles.

Another impressive feature of the R50 is its Advanced A+ Assist, which enables great imagery even in difficult settings such as night views and backlit scenarios. Overexposure is automatically reduced so you can capture dynamic scenes or bright portraits, and multiple continuous shots are taken to create beautiful night images or macro photography with a deeper depth of field.

For vlogging and video content creation, the R50 offers video recording features such as uncropped UHD 4K movie recording at up to 30 fps, Full-HD High-frame rate movie recording at up to 120 fps, Dual Pixel CMOS AF tracking, and Movie for Close-up Demo Mode. This mode quickly switches focus from the on-camera subject to an object that is presented towards the camera's lens, ideal for movies where showing a product to the viewers is necessary such as in makeup demos or cooking videos. The camera also lets you continuously record video for up to 1 hour, allowing you to set up your video and keep your vlog, podcast, or other video project rolling without worrying about it stopping.

In terms of connectivity, the R50 offers wired and wireless options for transferring photos and videos, live streaming, and remotely controlling the camera. The camera features a USB-C port, a micro-HDMI port, and a microphone port for video recording, as well as built-in Bluetooth pairing that lets you easily connect the camera to compatible smart devices using the free Canon Camera Connect app. Built-in Wi-Fi connectivity enables quick and seamless wireless functions, such as remote live view, file viewing, and transfer. UVC/UAC compatibility allows the R50 camera to be used as a web camera to stream live video in Full HD without additional computer software, making it an ideal tool for online content creators.

In conclusion, the Canon EOS R50 is a highly versatile mirrorless camera with a sophisticated photo and video feature set. 


35 Edgy Street Photography Presets
$19.99

These Lightroom presets have been specially created to work with street photos, travel photos, and night photos. They tend to have a lot of punch and will take your images to the next level. Remember you always have the amount slider to increase or reduce their effect.

Add To Cart

Screech owl trilling in his hole at sunset.

Gary Detonnancourt

Watch as the screech owl trills in his hole at sunset, surrounded by the beauty of a tree. This video is a must-watch for nature lovers everywhere!


35 Edgy Street Photography Presets
$19.99

These Lightroom presets have been specially created to work with street photos, travel photos, and night photos. They tend to have a lot of punch and will take your images to the next level. Remember you always have the amount slider to increase or reduce their effect.

Add To Cart

How to Make Your Street Shots Pop with the Fujifilm XT3 and Vintage Lenses

Gary Detonnancourt

Sunset street photography on a footbridge in Providence, Rhode Island. Shot with the Fujifilm XT3 and the Canon FD 24 mm F/2.8

If you are in Rhode Island, check out my local street photography workshops, which are posted on my meetup group called Rhode Island Photography Workshops.

If you like the edits in my photos check out my Lightroom Preset Pack below.

26 Black & White Lightroom Presets
$19.99

This digital download includes a zip file with 26 Black & White Lightroom Presets that can be used in the Develop Module of Lightroom Classic or Lightroom CC.

Add To Cart

My First Attempt at Street Photography

Gary Detonnancourt

I typically shoot with a Canon R5 but I’m just loving the shooting experience with this Fujifilm XT-3 and Canon FD Lenses.

I’ve shot many types of photography over the last twenty or so years and if you look through my website you’ll see that I mostly shoot wildlife, portraits, and some landscapes. Recently I guess I’ve been a little burned out because I haven’t been shooting much at all, of course, that could also be because my life has been quite hectic lately. Things have begun to settle down a bit and I’ve been getting the bug to get out and shoot again.

Canon FD 24 mm F/2.8 on a Fugifilm XT-3

The recent Youtube videos I’ve been watching have been about vintage lenses and street photography, both of which are totally new to me. I thought these two things would probably go great together and I should give them a go.


For the images you will see in this article, I used the 24 mm lens at F/8 and set the focus to infinity and I didn’t have to make any adjustments for all of my images to come out in focus. Not having to focus allowed me to compose and shoot very quickly.

I recently purchased the Canon FD 24 mm F/2.8 and the 50 mm F/1.4 and the Fotasy FD to Fuji X adapter to put them on my Fujifilm XT-3. I also purchased a Canon FD to RF adapter so I could use the lenses on my R5.

I just love the look and feel of these lenses, even though they are from the 80s they feel high quality, and the manual focus experience is buttery smooth. Plus focus peaking on the XT-3 makes manually focusing very easy.

My plan was to visit a local city and to look for interesting locations with good light and hope to capture people moving through these scenes. What I learned was it’s not as easy as it sounds. Finding interesting places in good light with people is quite challenging and fun. I wanted high-contrast black-and-white images but I also didn’t want to lock myself into just one type of photo so I shot raw files and processed them in Lightroom CC on my Ipad.

This was the first image of the day and I liked it because I caught the dog in action and I like the long shadows on the brick.

I’m also new to the whole iPad editing workflow. I like it because you can work directly on the image with the Apple pencil and it’s fun to be able to edit anywhere I want and not have to be tied to a desktop computer. I found that I can do most of what I can do with Lightroom Classic and it’s pretty fast and easy. I also really like that the images as synced to all of my devices through the cloud.

My next image was more inline with what I was looking for, a high-contrast black and white image with an interesting person walking through an interesting place. The gesture he makes with his hand makes the image for me.

If you like the look of the processing in this image, here is the link to purchase this Lightroom Preset, so you can try it out on your images.

I liked this scene because of the colors and leading lines taking you to the Capital building.

This wasn’t my favorited image of the day but I did capture a typical city scene.

I mostly like this image because of the sun star produced by the Canon FD 24 mm lens.

This is my favorite image of the day. I love the diagonal line of shadows leading to the man in the wheelchair. The fact that he is wearing a mask adds a story to the image as the city deals with a lingering pandemic.

This may not be a typical street image because it looks like she is smiling for the camera, but it actually was a totally candid shot.

I’m not really sure why I like this image but I do. I think it’s the balance feeling of the composition.

I walked passed this finely dressed gentlemen and he seemed to be just waiting there ready to pose for a photographer and it may look sort of posed but it was totally candid.

Same shot taken from the opposite direction.

This one caught my eye because of the shape of the tree and the sun star.

This is my second favorite image of the day. I like the juxtaposition of the Indian couple walking past the Native American murial.

At the end of my photo walk I stopped at a coffee shop and I just loved the look of this girl. I think here outfit tells an interesting story.

I hope you enjoyed my first attempt at street photography, I certainly did. This surprised me quite a bit because I’m not big on cities. However, I found the photographic techniques of hunting and gathering to be fun and very challenging.

How to Create Brushes for Photoshop

Gary Detonnancourt

If you would like to learn more about Photoshop CC, you should become a Snapshot Member, so you can get access to all ten of my online classes plus free digital content like brushes. Now 50% off with this link.

https://morethanasnapshot.teachable.com/p/snapshot-members?coupon_code=SNAPSHOT50